Important note: This blog post is one of the top hits on Google for “googletest visual studio”. It is however quite old, and might no longer reflect the best way to use GoogleTest with Visual Studio.
Google C++ Testing Framework (aka. GoogleTest) is a unittesting framework for C++. This post describes how to install it, and set it up in your project. I am using GoogleTest 1.6.0 here, but other versions should be similar. The instructions provided are for Visual Studio 2010, but 2012 should be exactly the same.
Installation
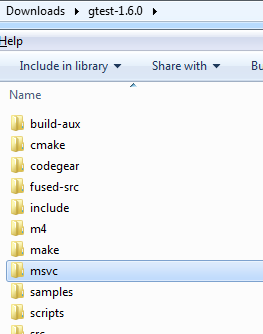
First of all, download the latest version from the GoogleTest download page, and unzip it. Inside, you will find a directory called msvc, which contains the Visual Studio solutions:
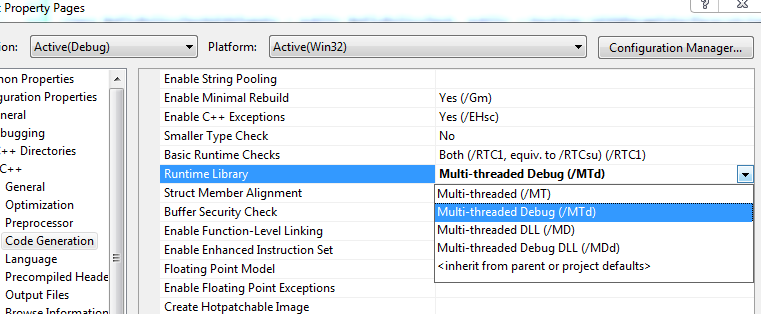
In this directory, you will find two solutions, gtest.sln, and gtest-md.sln. Which one you want depends on whether you are using a static or dynamic runtime. If you are unsure which one to use, take a look in your existing solution:
If you are using the DLL version of the runtime, use the gtest-md.sln solution, otherwise use gtest.sln. Before you open the solution though, make sure it is not read only, as Visual Studio will want to convert it to your version: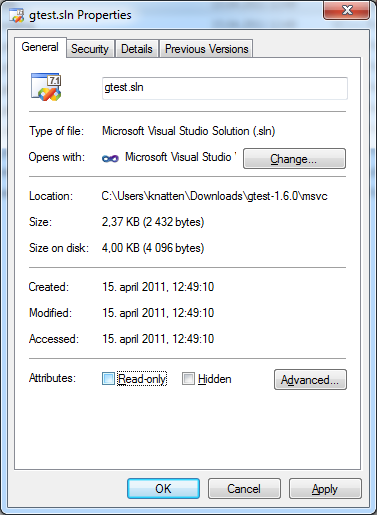
Open the solution you want, agree to convert the solution. Make sure you build it both in Debug and Release versions. The resulting libraries end up in gtest-1.6.0\msvc\gtest\Debug and gtest-1.6.0\msvc\gtest\Release, respectively. This is a good time to copy the libraries to wherever you keep libraries for your projects. The files you will need are gtestd.lib and gtest_maind.lib from the Debug directory, and gtest.lib and gtest_main.lib from the Release directory. In addition, you need all the headers from gtest-1.6.0\include. (Of course, you could just copy the entire gtest-1.6.0 directory and not care about which files you need.)
Setup for Your Project
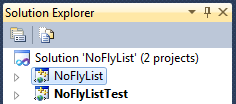
I suggest to use one test project per production project. This makes it easy to find the tests you are looking for. Also, if your code is nicely decoupled, you might be able to link just these two projects, and not your entire solution. This can speed up your “red-green-refactor” cycle considerably. Finally, this makes it easy to exclude your test code from the final binary you ship. Here is an example from my Kjeller Software Community presentation:
Set the following properties for your test project:
- Make sure to set up the test project to use the same runtime library as your production project (
MT / MTd / MD / MDd). - Add an additional include directory
c:\wherever\you\put\gtest\include - Add an additional library directory
c:\wherever\you\put\the\libs - Under
Linker -> Input, add a dependency ongtest.libfor yourReleaseconfiguration, andgtestd.libfor yourDebugconfiguration. Unless you want to write your own main function that runs all the tests, also add a dependency ongtest_main.lib/gtest_maind.lib, respectively. This will add amain()method to your project which discovers and runs all the tests. - Under
Properties -> Linker -> System, setSubSystemtoConsole, to keep the test-window open after the tests have run.
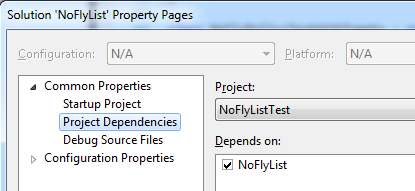
Also make sure that your test project depends on the production project:
And that’s it! Now you can start writing and running tests, but since the documentation already describes that pretty well, I will not go into that here. If you want to have a look at the code from my Kjeller Software Community demo, it is available on GitHub.
If you enjoyed this post, you can subscribe to my blog, or follow me on Twitter.
Note: To use GoogleTest in Visual Studio 2012, you might need to set _VARIADIC_MAX=10 under Properties->C/C++->Preprocessor->PreprocessorDefinitions on the projects that use it.
Thanks for the nice overview.
Even after getting the _VARIADIC_MAX=10 trick, it still took some work to build gtest-md in VS 2012.
First there are build warnings because the project’s final outputs don’t match the expected $(TargetPath). I think you can ignore these, but I actually changed the projects to make the outputs match.
Then there are problems if you choose Rebuild Solution, because some of the cleanup happens at the beginning of each project. First, gtest-md builds fine, and then gtest_main-md builds fine. At that point it attempts to build gtest_prod_test-md and gtest_unittest-md. But since it’s a _rebuild_ command, additional cleanup first happens in the output directory. This has the side effect of deleting gtest.lib (the main output from the first project). And thus the last two projects fail to link. Building (not rebuilding) the projects one at a time (in the proper order) solves the problem.
Great entrance into gtest with vs. Thank you so much for putting this up!
Most excellent! Thank you. This should be part of the Google Test documentation as how to get up and running quickly with Visual Studio.
In the “Setup for Your Project” you do not say what type of project (EXE, DLL, LIB?) is the test project.
Note that we have developed a Visual Studio extension which integrates Google Test with the VS test explorer, allowing to run tests from within VS without need to check the output window. The extension can be installed from VS via Tools/Extensions and Updates or downloaded from the GitHub project page at https://github.com/csoltenborn/GoogleTestAdapter
Thanks for the notice! I’ll have a look the next time I’m on a project that uses GoogleTest and Visual Studio.
Another great solution from the Internet that doesnt work and never could have possibly worked. Great job.
I’m sorry you didn’t find anything to help you in this post. As mentioned in the first paragraph, the article is old and not up to date. I hope you were able to find more up-to-date information elsewhere.
These instructions worked for me on Visual Studio 2015, thank you so much! :-)
I’m glad to hear that! Thanks for letting me know! :)
There’s more to do if you want 32 bit and 64 bit build modes to be possible. It seems to be 32 bit only.